Back to MaintenanceDirect Main Menu
Account Information
The Account Information page allows you to identify important and helpful information about your organization, such as the Address, Fiscal Year, and Tax Rate.
How to Set Up the Account Information
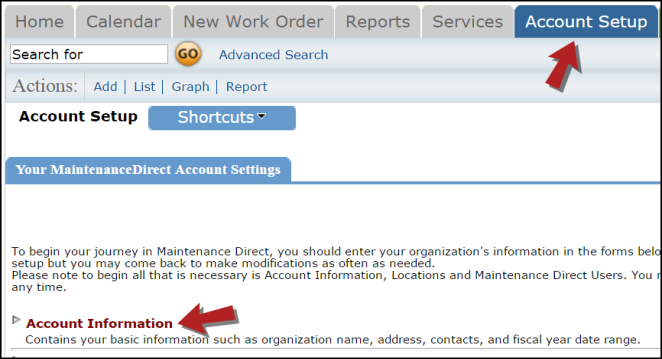
- Click on the Account Setup tab.
- Click on the Account Information link.
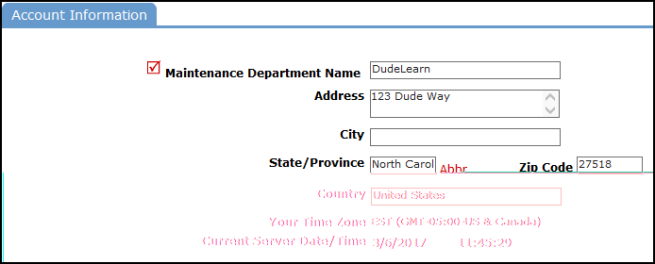
- The Maintenance Department Name and Address will automatically populate for you. The Maintenance Department Name can be edited and will be displayed in the upper left hand corner of the screen. Corrections to the address information can also be made here.
- The Time Zone and Current Server Date/Time are populated based on your organization's address.
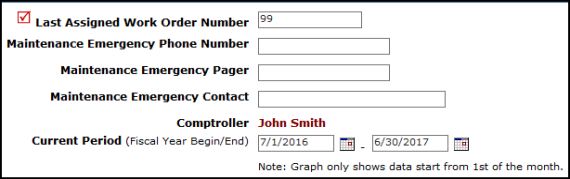
- The Last Assigned Work Order Number defaults to 99, which assigns the first work order created as Work Order ID 100. This number can be adjusted in the initial setup, however it cannot be set to a number below 99.
- The Maintenance Emergency Phone Number, Pager, and Contact information are optional fields.
-
- In the Current Period fields, enter your organization's Fiscal Year Begin and End dates.
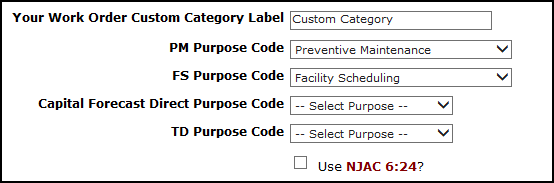
- Define the name for Your Work Order Custom Category Label here. The Custom Category is a reportable field available to track any additional information important to your organization.
- The Purpose Code fields are used when your organization owns other Dude Solutions products in addition to Work Order. These purpose codes will automatically populate on work orders created from your other Dude Solutions applications and are color coded to each product. To select a code in the following fields, you must first add the Purpose Code to the account.
- If you own PMDirect, define your PM Purpose Code; most commonly "Preventive Maintenance." Any work order generated from PMDirect will automatically display this purpose code and will have a yellow background.
- If you own FSDirect, define your FS Purpose Code; most commonly "Facility Scheduling" or something similar. Any work orders generated from tasks in FSDirect will automatically display this purpose code and will have a light blue background.
- If you own CapitalForecastDirect, define your Capital Forcast Direct Purpose Code; most commonly "Capital Planning" or something similar. Any work order generated from a need in CapitalForecastDirect will automatically display this purpose code and will have a dark blue background.
- If you own TripDirect, define your TD Purpose Code; most commonly "Field Trip" or something similar. Any work orders generated from a field trip in TripDirect will automatically display this purpose code and will have an orange background.
- If you have the integration set up between MaintenanceDirect and Event Manager, define your Event Manager Purpose Code; most commonly "Event Manager" or something similar. Any work orders generated from a task in Event Manager will automatically display this purpose code and will have a light blue background. *Note: This purpose code will only display if the integration between Event Manager and MaintenanceDirect is active. To learn if you are eligible, contact Client Services.
- *For Public K-12 New Jersey clients* Check Use NJAC 6:24 to add the M1 and M2 reports to your homepage.
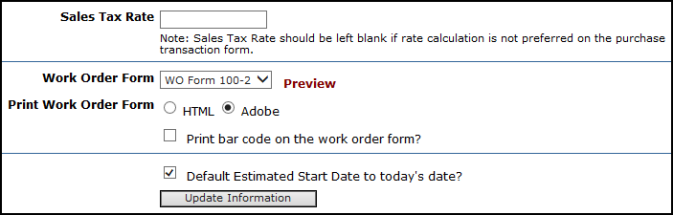
- Enter your Sales Tax Rate here to automatically populate when entering transactions. If your organization is tax exempt, leave this field empty.
- The Work Order Form can be printed in one of four different formats. Select the form you would like to use from the drop down box. *Note: Once there is a work order in the account, you can preview the forms by clicking the Preview link.
- Define whether the Print Work Order Form will be printed in HTML or Adobe format. The Adobe format is recommended if you will be using batch printing. If using a bar code scanner, check Print bar code on the work order form.
- Checking Default Estimated Start Date to Today's Date will input the date the work order is created in the Target Start Date field on the work order form.
- Click Update Information to save.